How to Build a WebRTC Signal Server with PocketBase
Overview
If you are new to WebRTC then I suggest checking out this great Fireship video on WebRTC in 100 seconds:
Also if you are looking for a Firebase example then check out this repository which this example is largely based on.
This example is built using PocketBase as the signal server for WebRTC and runs SQLite on the server with easy to use realtime SDKs built on top of Server Sent Events (SSE).
Setting up the server
Download PocketBase and create a new directory that we will use for the project.
mkdir webrtc-pocketbase-demo
cd webrtc-pocketbase-demo
Copy the PocketBase binary into the directory you just created under a sub directory .pb. If you are on MacOS you will need to allow the executable to run in settings.
Start the PocketBase server with the following command:
.pb/pocketbase serveIf all goes well you should see the following:
2023/11/04 15:10:56 Server started at http://127.0.0.1:8090
├─ REST API: http://127.0.0.1:8090/api/
└─ Admin UI: http://127.0.0.1:8090/_/
Open up the Admin UI url and create a new username and password.
For this example the email and password will be the following:
Key
Value
Password
Test123456789
You should now see the following:
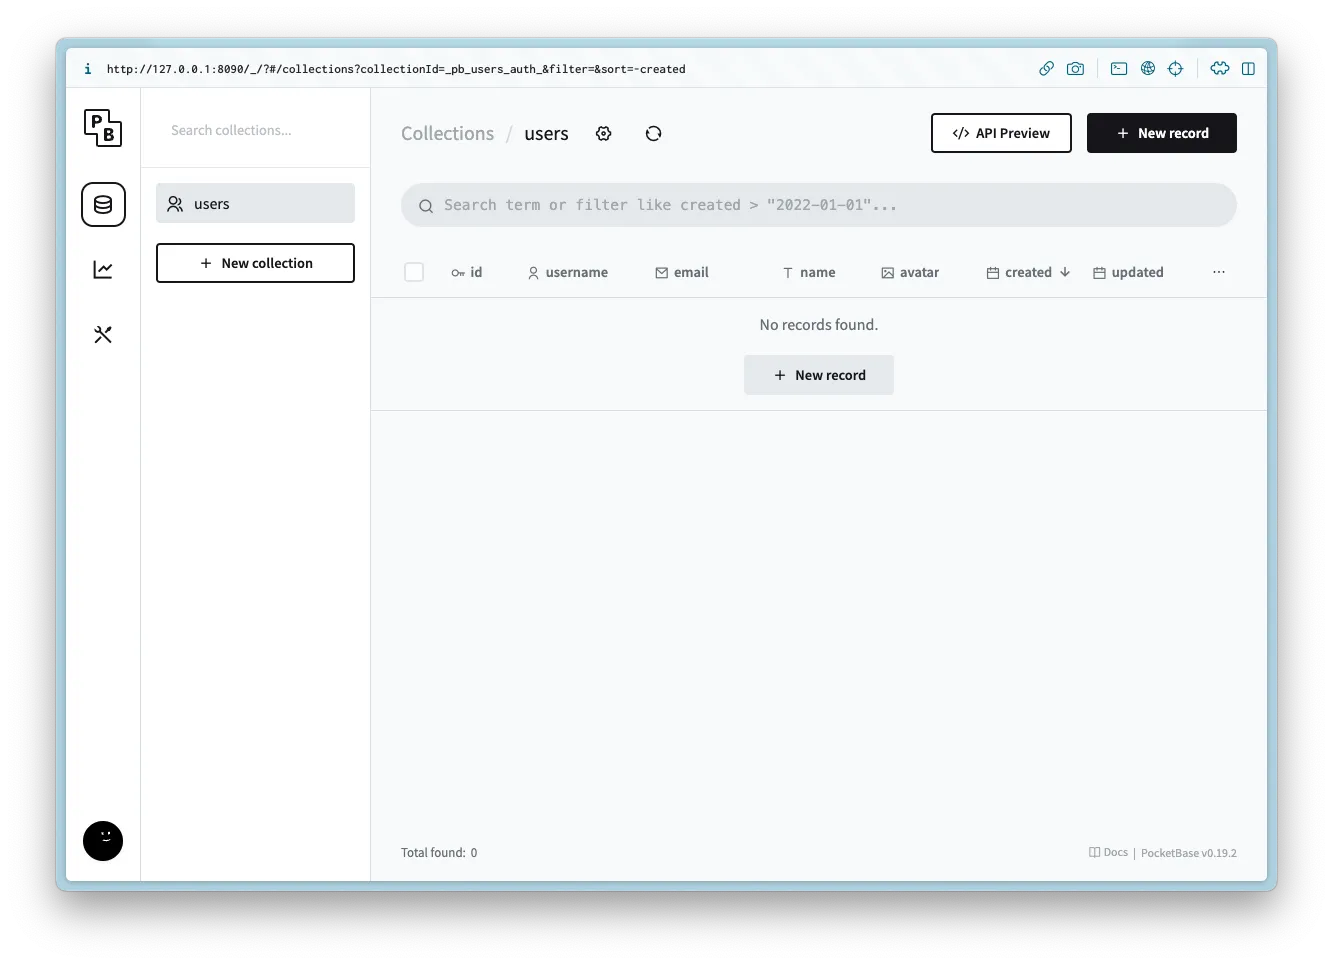
Creating the collections
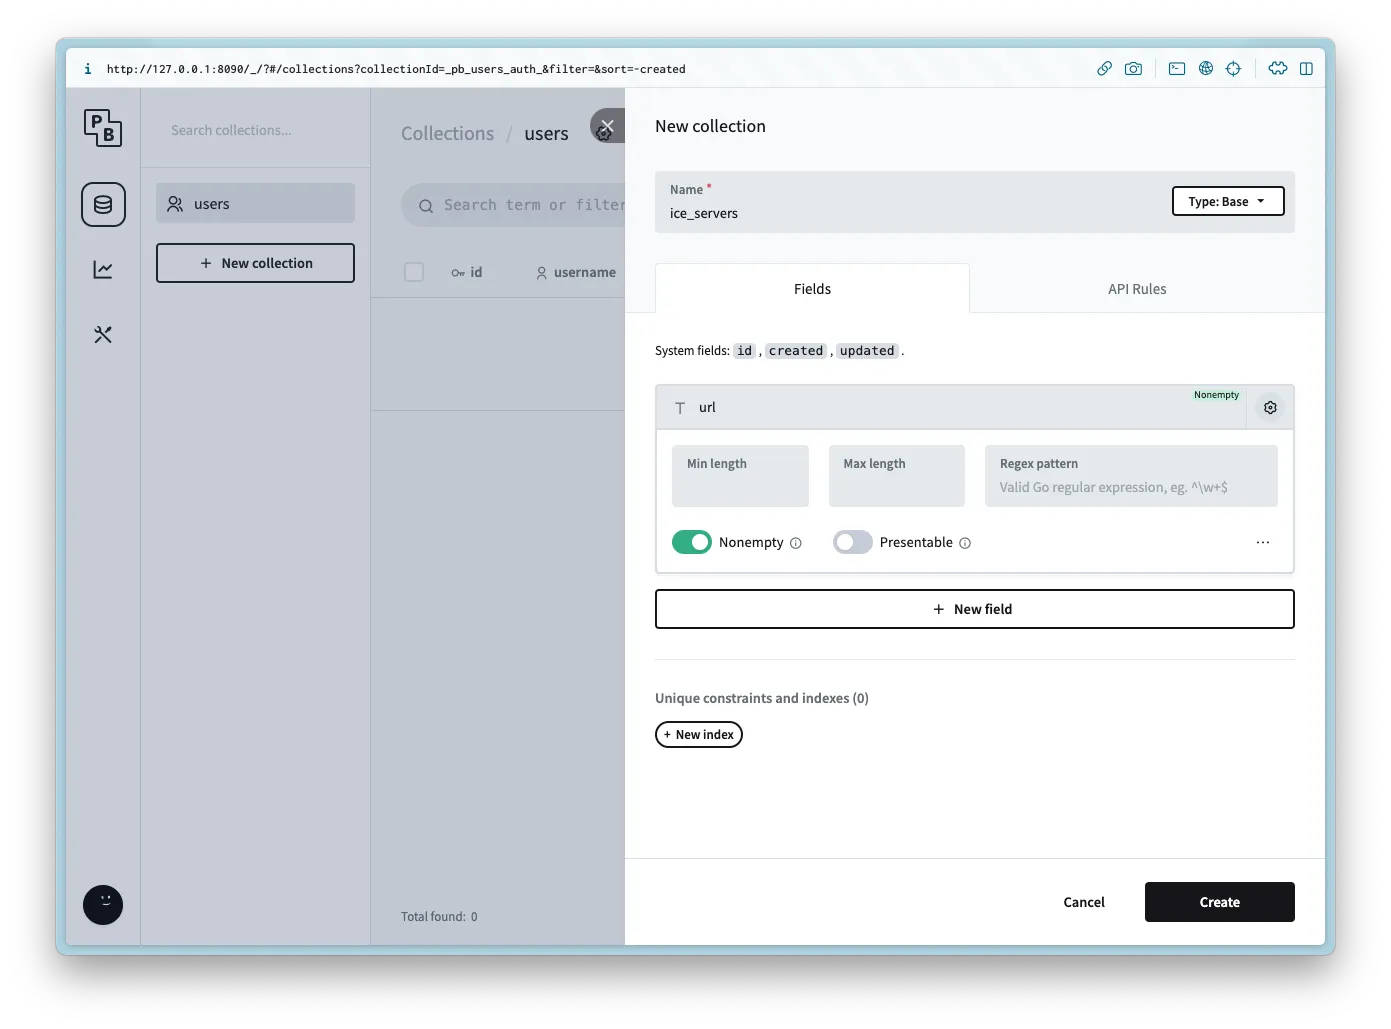
ice_servers
Create a new collection named ice_servers with the following columns:
Column Name
Column Type
url
Plain text
Add the following API rule to the List/Search and View:
@request.auth.id != ''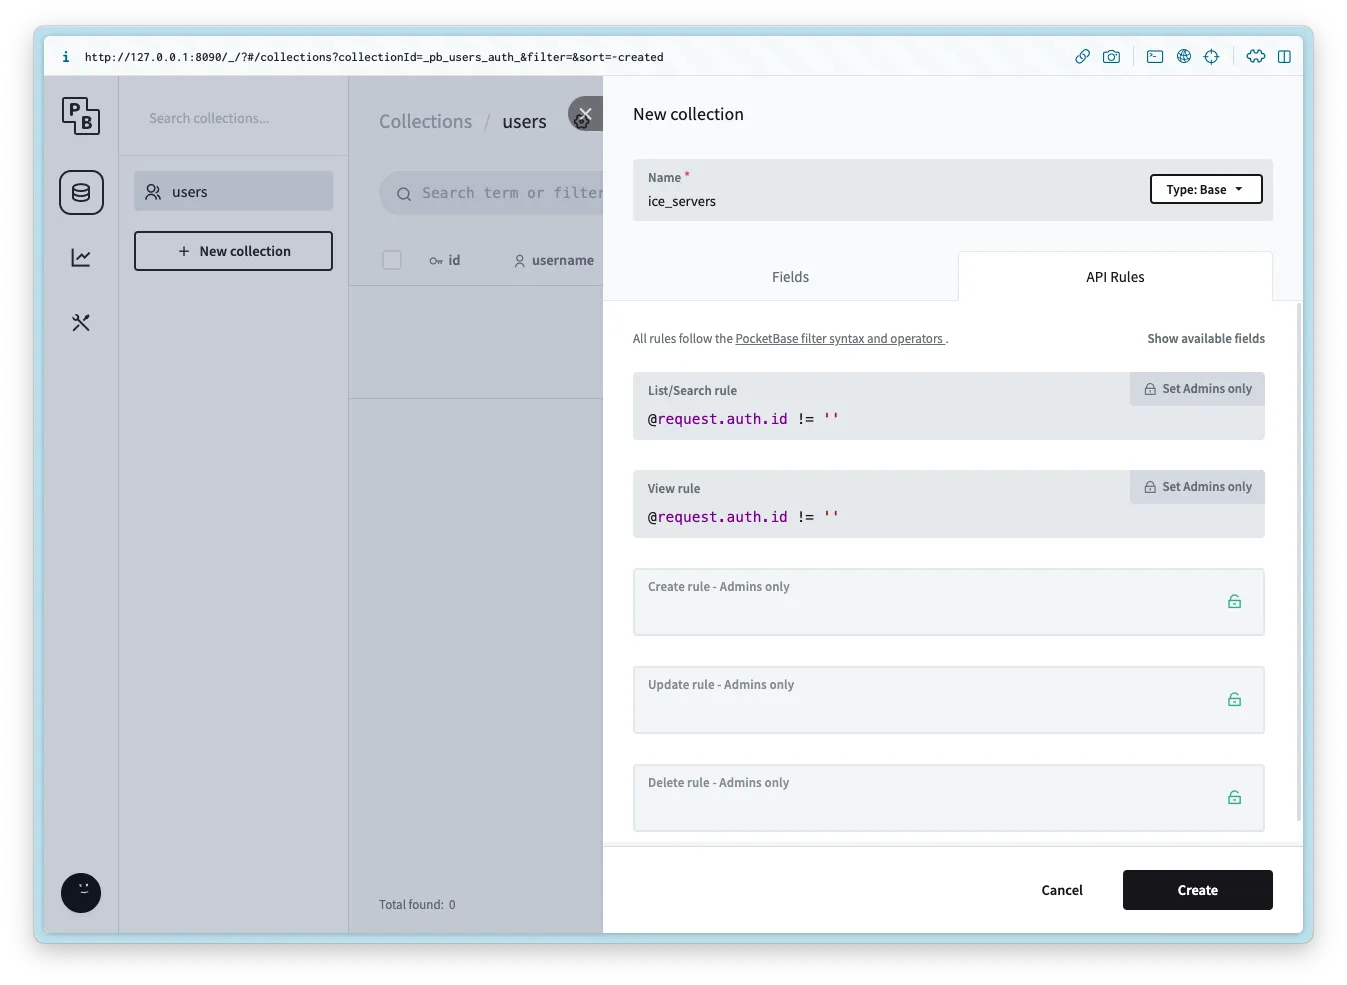
After the collection is created add 2 records for each of the following values for the url:
stun:stun1.l.google.com:19302
stun:stun2.l.google.com:19302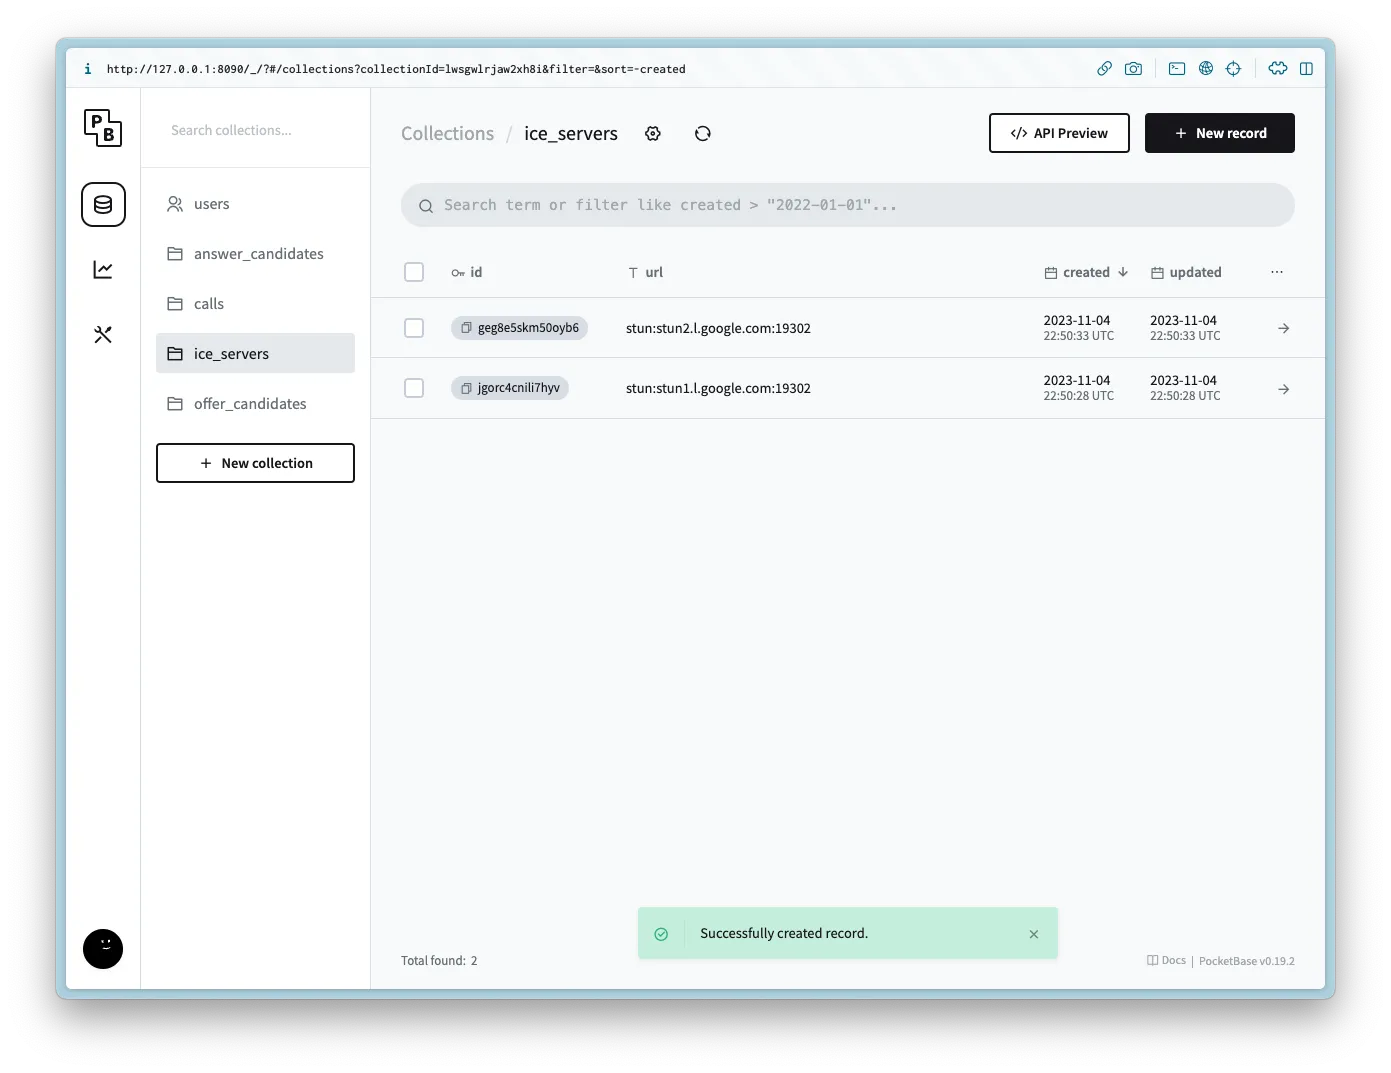
calls
Create a new collection named calls with the following columns:
Column Name
Column Type
Column Settings
user_id
Relation
Non empty, users, Cascade delete is true
offer
JSON
answer
JSON
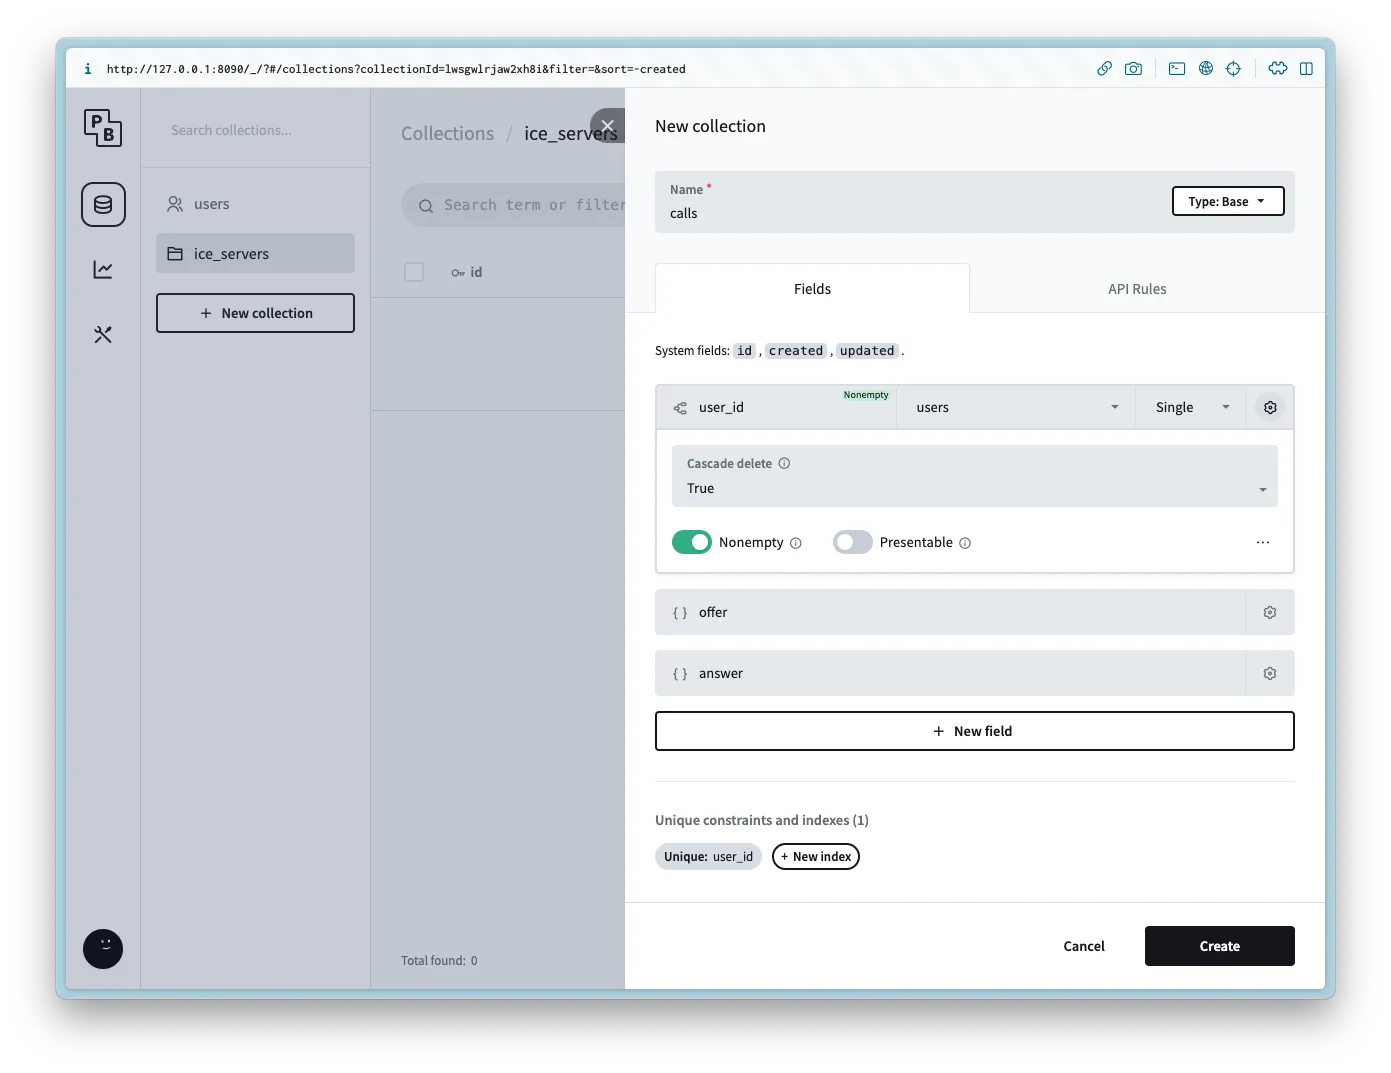
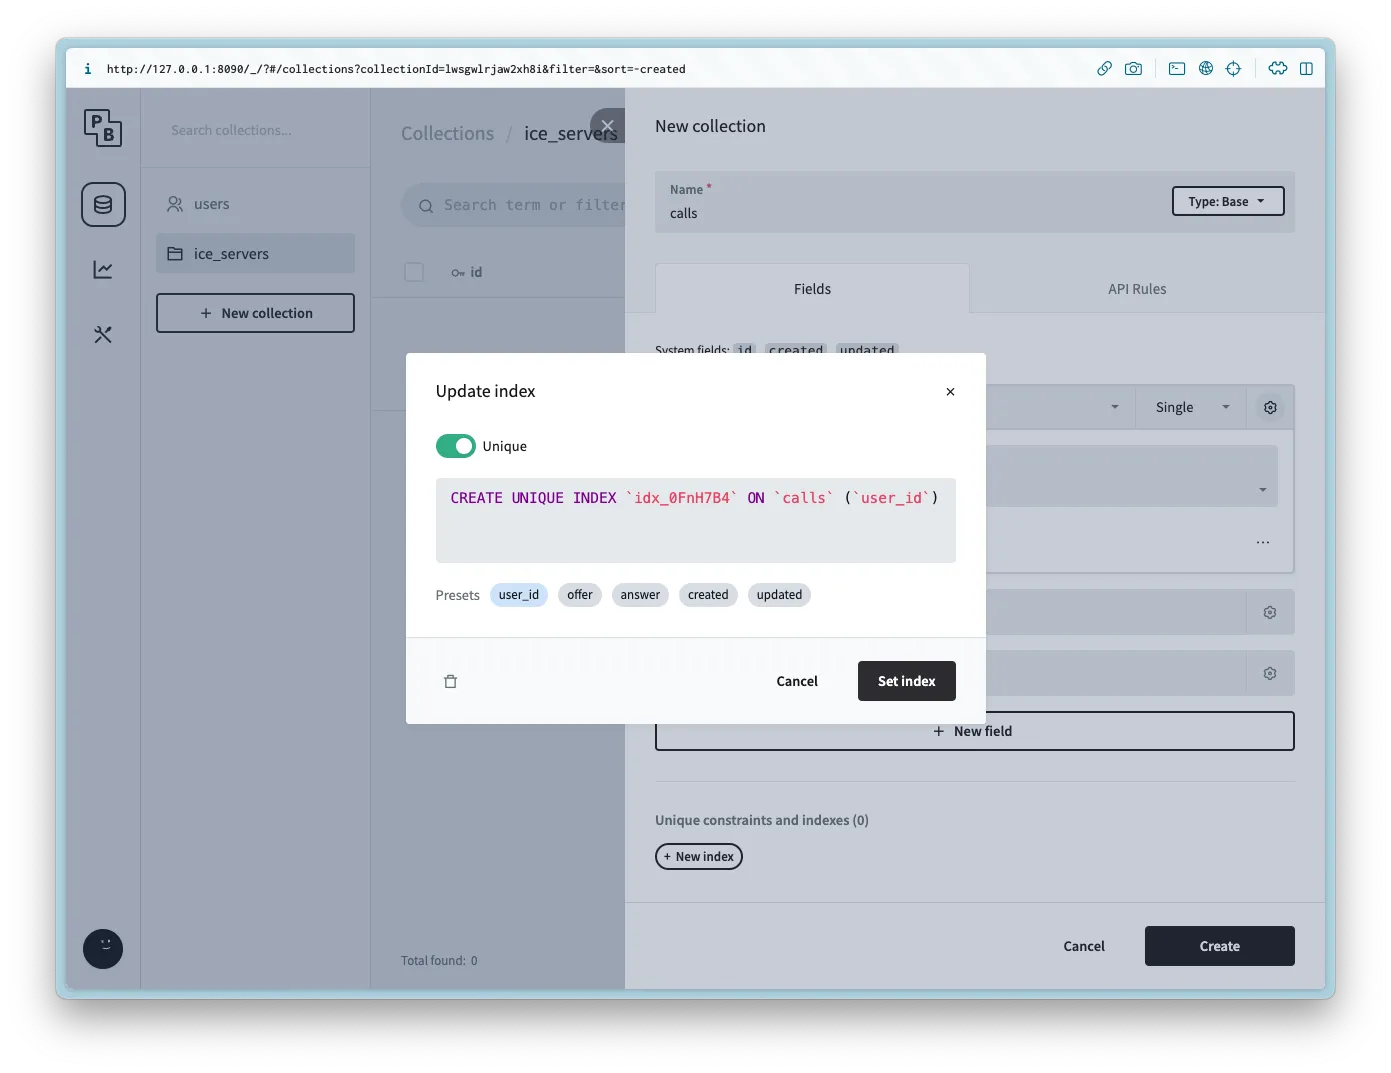
it is also possible to limit the user to one call each by setting the Unique constraint on the user_id column.
Add the following API rule to all of the methods:
@request.auth.id != ''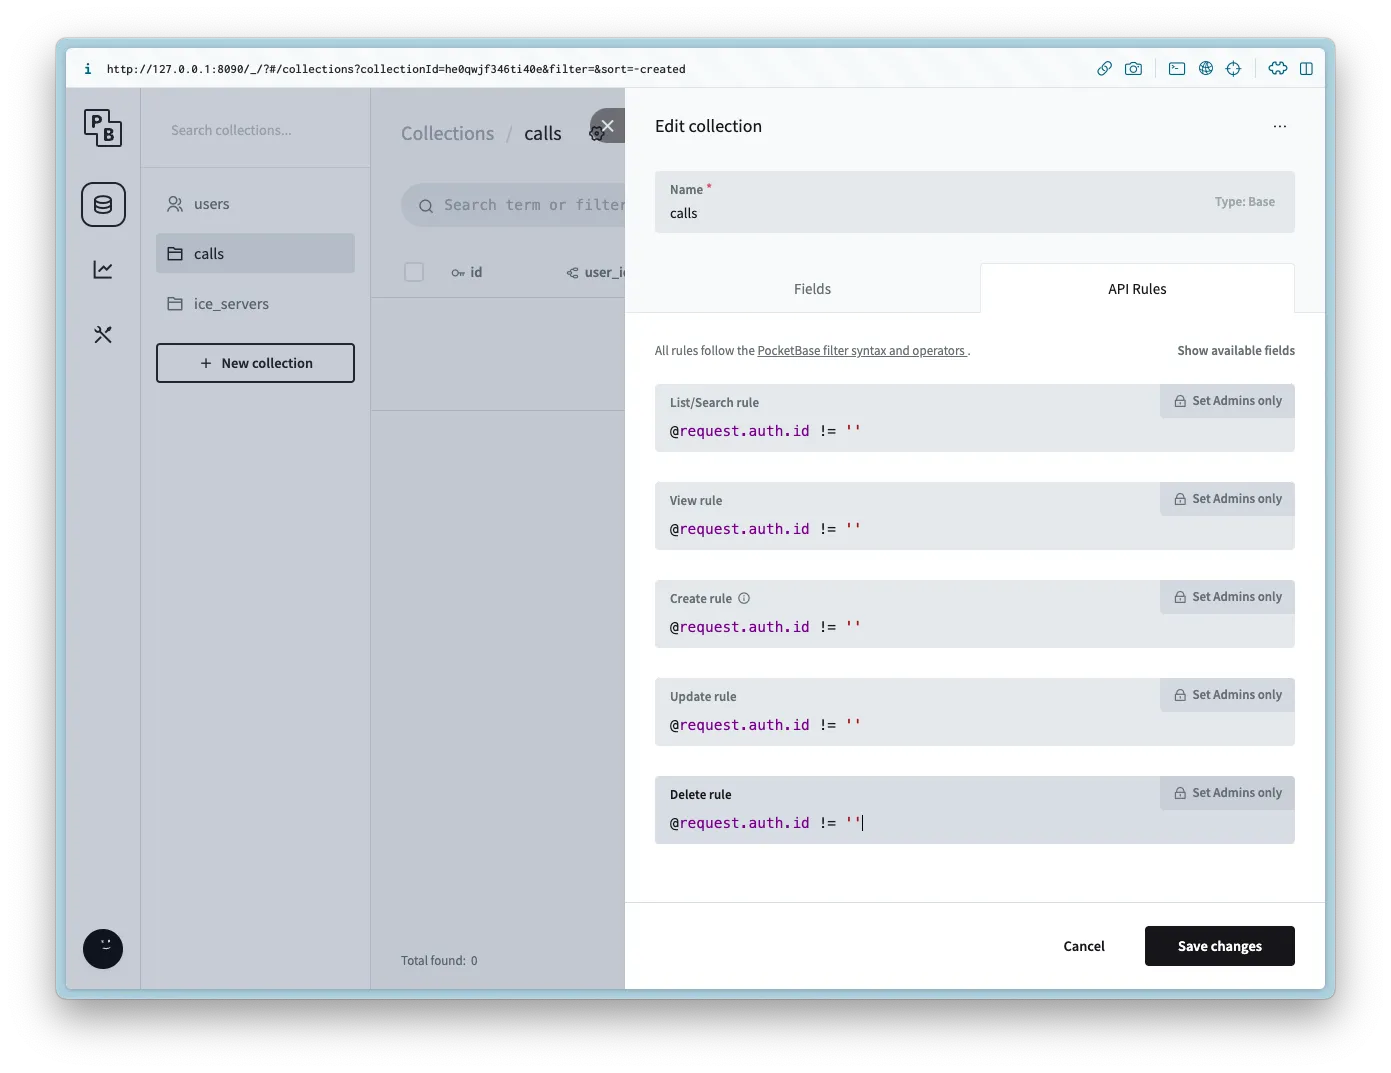
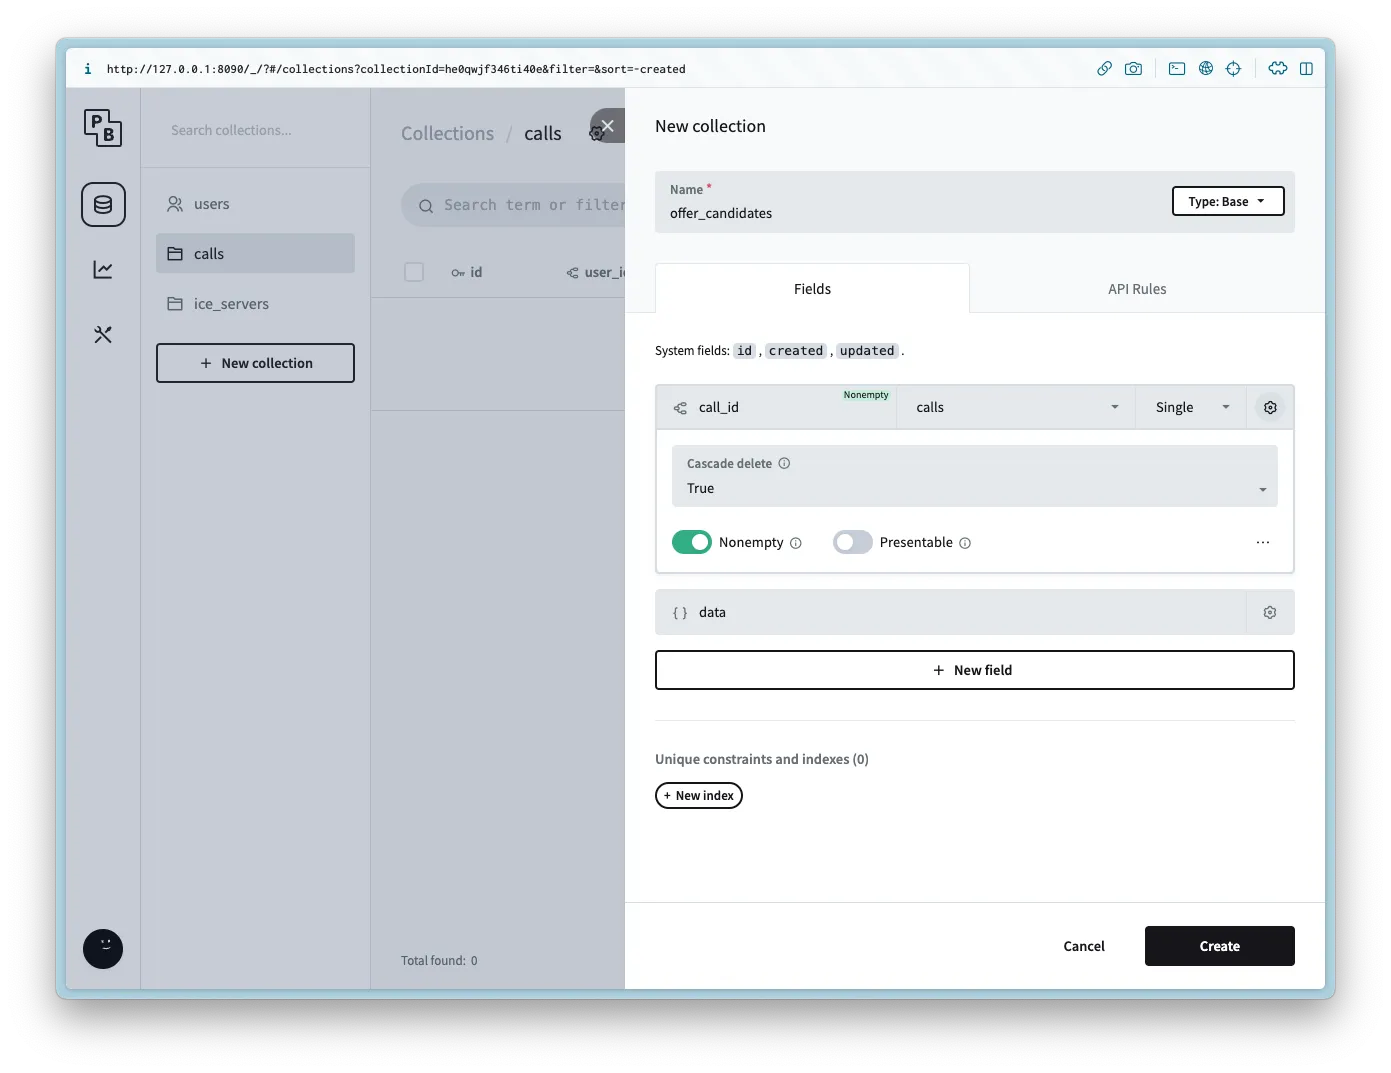
offer_candidates
Create a new collection named offer_candidates with the following columns:
Column Name
Column Type
Column Settings
call_id
Relation
Non empty, calls, Cascade delete is true
data
JSON
Add the following API rule to all of the methods:
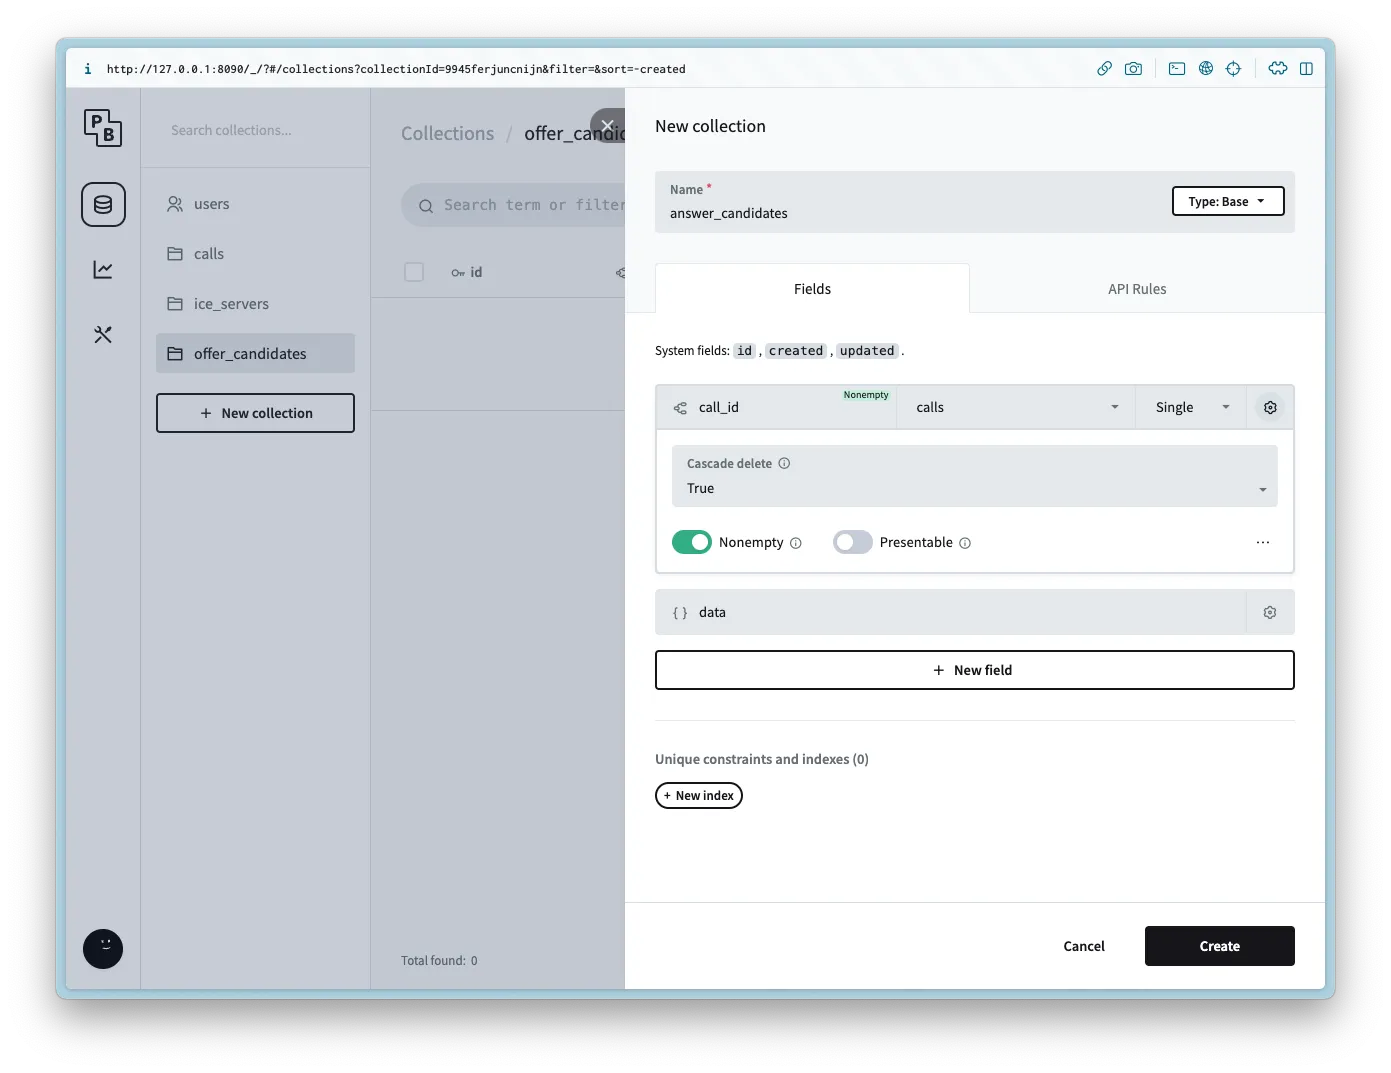
@request.auth.id != ''answer_candidates
Create a new collection named answer_candidates with the following columns:
Column Name
Column Type
Column Settings
call_id
Relation
Non empty, calls, Cascade delete is true
data
JSON
Add the following API rule to all of the methods:
@request.auth.id != ''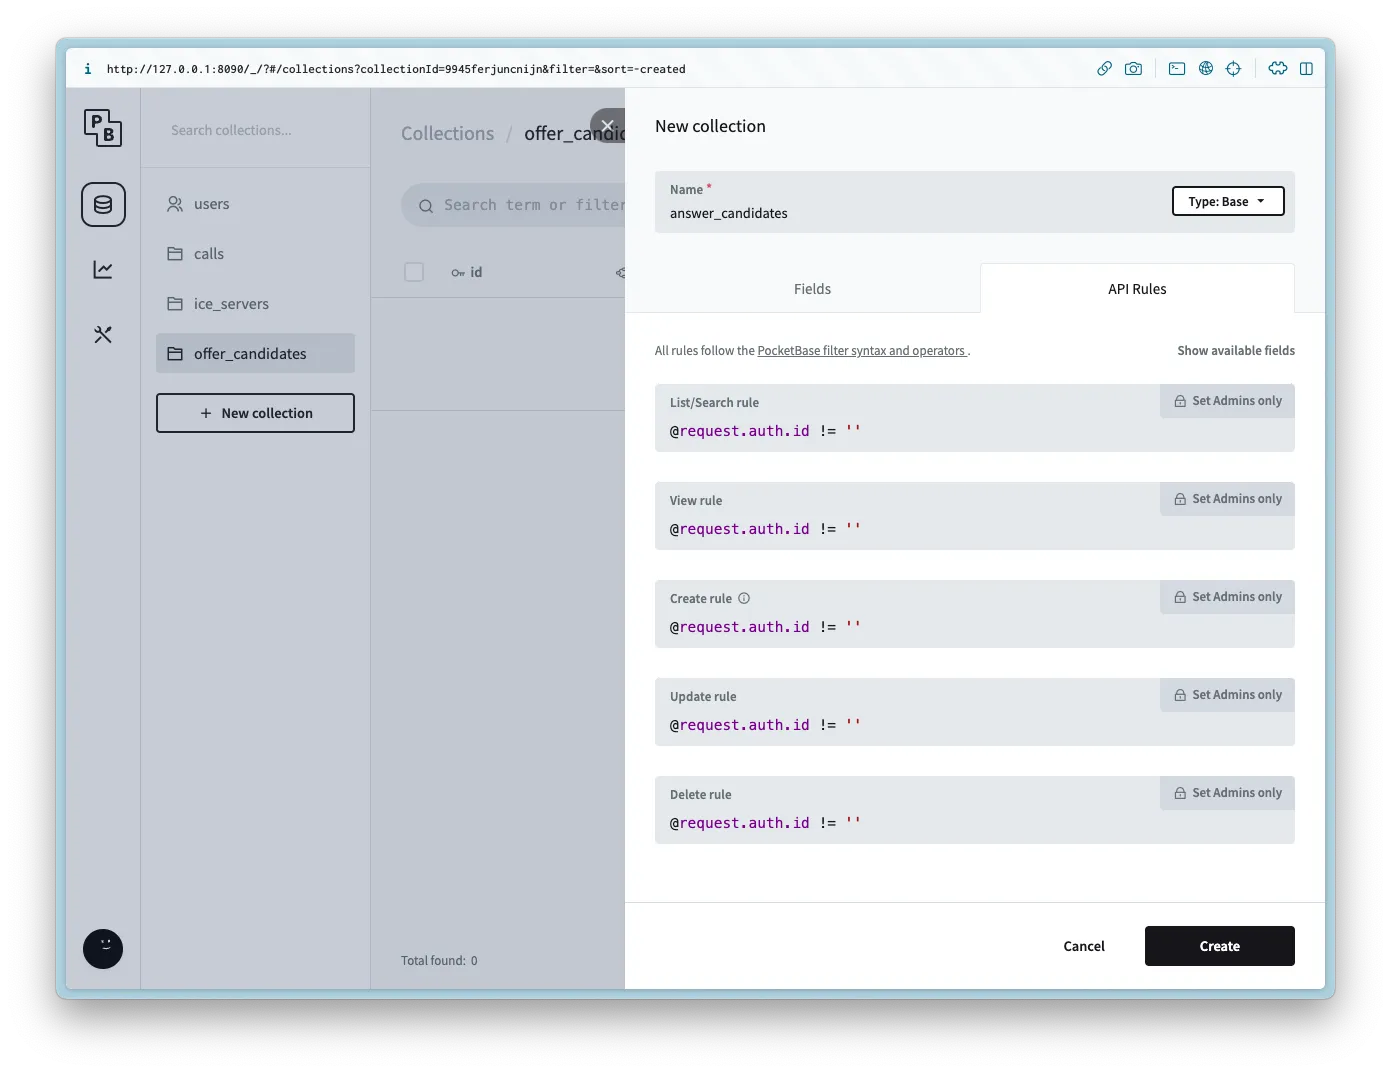
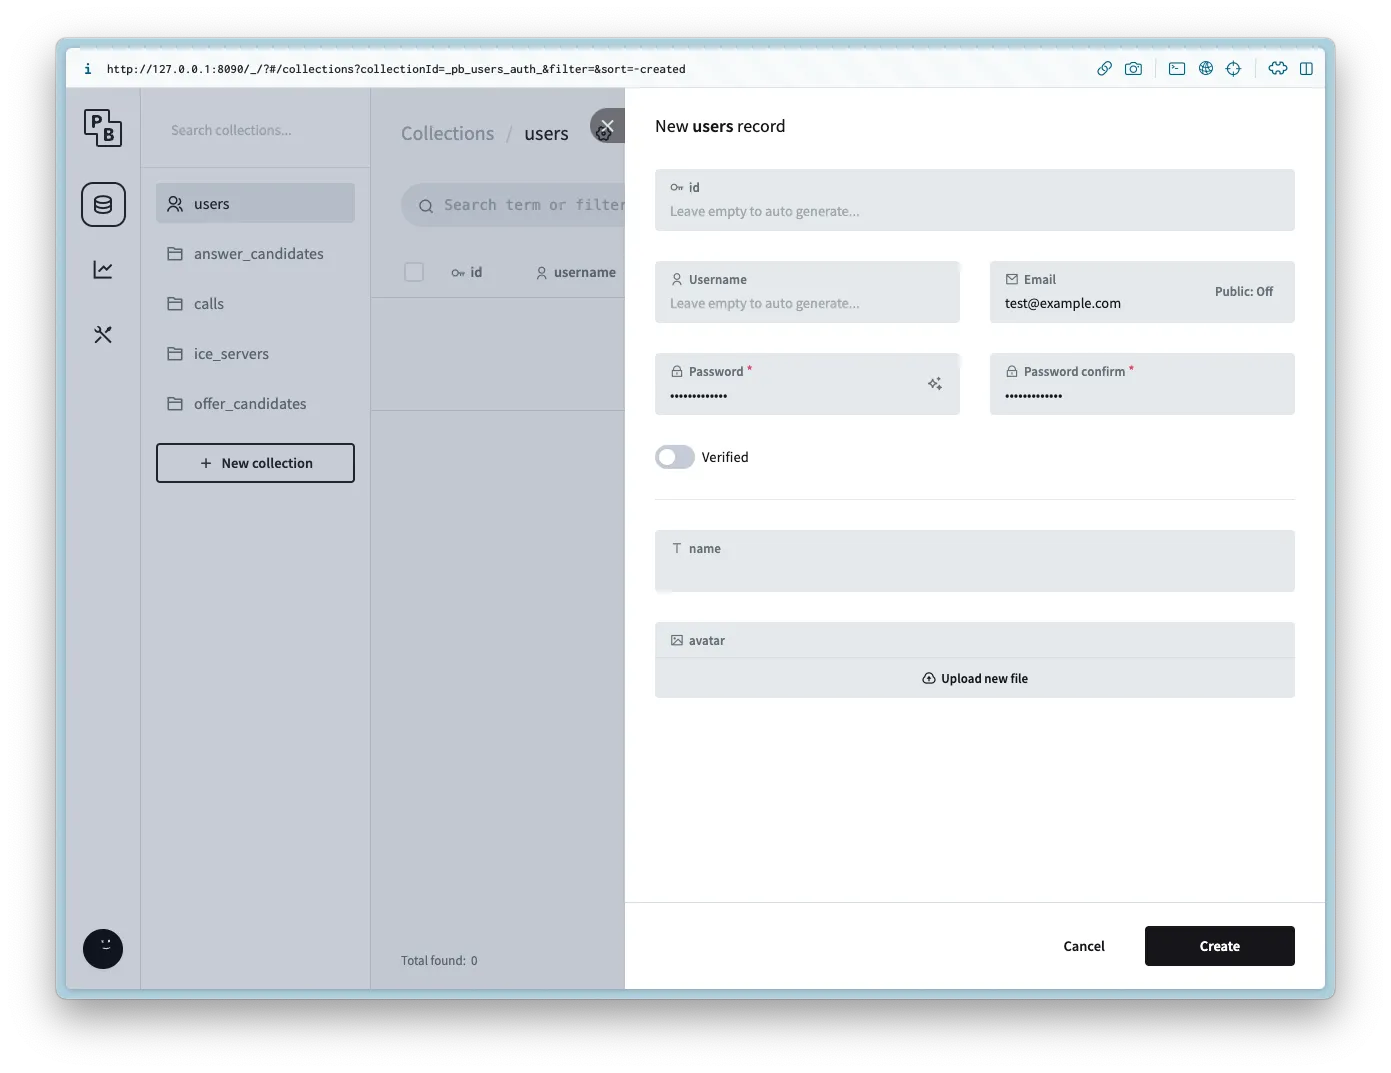
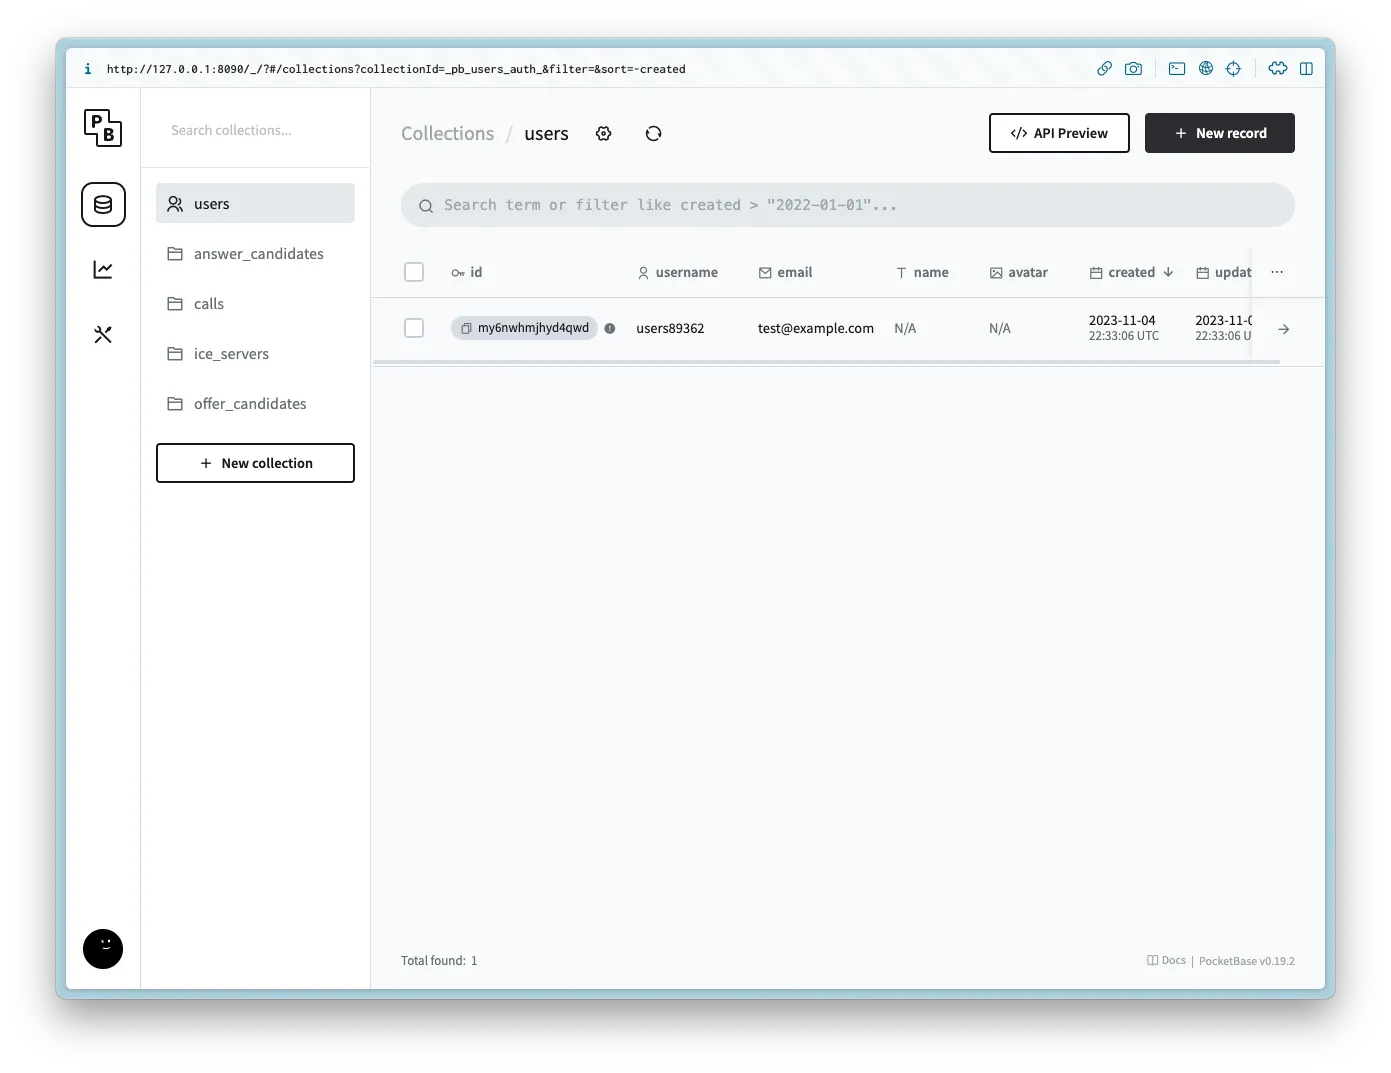
users
For demo purposes we will not be including an auth form for the user, but to make the example simple create a new user with the same login info for the admin.
Setting up the client
Navigate to the directory and run the following commands to get started:
npm init -y
npm i -D vite
npm i pocketbase
Update the package.json to be the following:
{
  "name": "webrtc-pocketbase-demo",
  "version": "0.0.0",
  "scripts": {
    "dev": "vite",
    "build": "vite build",
    "serve": "vite preview"
  },
  "devDependencies": {
    "vite": "^4.5.0"
  },
  "dependencies": {
    "pocketbase": "^0.19.0"
  }
}
If you are in a Git repository update/create the .gitignore to have the following:
node_modules
.DS_Store
dist
dist-ssr
*.local
.pb
.env
HTML
Create index.html and add the following:
<!DOCTYPE html>
<html lang="en">
  <head>
    <meta charset="UTF-8" />
    <link rel="icon" type="image/svg+xml" href="favicon.svg" />
    <meta name="viewport" content="width=device-width, initial-scale=1.0" />
    <title>WebRTC Pocketbase Demo</title>
  </head>
  <body>
    <h2>1. Start your Webcam</h2>
    <div class="videos">
      <span>
        <h3>Local Stream</h3>
        <video id="webcamVideo" autoplay playsinline></video>
      </span>
      <span>
        <h3>Remote Stream</h3>
        <video id="remoteVideo" autoplay playsinline></video>
      </span>
    </div>
    <button id="webcamButton">Start webcam</button>
    <h2>2. Create a new Call</h2>
    <button id="callButton" disabled>Create Call (offer)</button>``
    <h2>3. Join a Call</h2>
    <p>Answer the call from a different browser window or device</p>
    <input id="callInput" />
    <button id="answerButton" disabled>Answer</button>
    <h2>4. Hangup</h2>
    <button id="hangupButton" disabled>Hangup</button>
    <script type="module" src="/main.js"></script>
  </body>
</html>
CSS
Create style.css and add the following:
body {
  --text-color: #2c3e50;
  --video-background-color: #2c3e50;
  font-family: system-ui, -apple-system, BlinkMacSystemFont, "Segoe UI", Roboto,
    Oxygen, Ubuntu, Cantarell, "Open Sans", "Helvetica Neue", sans-serif;
  -webkit-font-smoothing: antialiased;
  -moz-osx-font-smoothing: grayscale;
  text-align: center;
  color: var(--text-color);
  margin: 80px 10px;
}

video {
  width: 40vw;
  height: 30vw;
  margin: 2rem;
  background: var(--video-background-color);
}

.videos {
  display: flex;
  align-items: center;
  justify-content: center;
}
JS
Create main.js and add the following:
import "./style.css";

import PocketBase from "pocketbase";

const pb = new PocketBase("http://127.0.0.1:8090");

const calls = pb.collection("calls");
const offerCandidates = pb.collection("offer_candidates");
const answerCandidates = pb.collection("answer_candidates");

const webcamButton = document.getElementById("webcamButton");
const webcamVideo = document.getElementById("webcamVideo");
const callButton = document.getElementById("callButton");
const callInput = document.getElementById("callInput");
const answerButton = document.getElementById("answerButton");
const remoteVideo = document.getElementById("remoteVideo");
const hangupButton = document.getElementById("hangupButton");

const auth = await pb
  .collection("users")
  .authWithPassword(
    import.meta.env.VITE_POCKETBASE_USERNAME,
    import.meta.env.VITE_POCKETBASE_PASSWORD
  );
const userId = auth.record.id;
const iceServers = await pb.collection("ice_servers").getFullList();

const servers = {
  iceServers: [{ urls: iceServers.map((e) => e.url) }],
  iceCandidatePoolSize: 10,
};

const pc = new RTCPeerConnection(servers);
let localStream = null;
let remoteStream = null;

webcamButton.onclick = async () => {
  localStream = await navigator.mediaDevices.getUserMedia({
    video: true,
    audio: true,
  });
  remoteStream = new MediaStream();

  localStream.getTracks().forEach((track) => {
    pc.addTrack(track, localStream);
  });

  pc.ontrack = (event) => {
    const stream = event.streams[0];
    stream.getTracks().forEach((track) => {
      remoteStream.addTrack(track);
    });
  };

  webcamVideo.srcObject = localStream;
  remoteVideo.srcObject = remoteStream;

  callButton.disabled = false;
  answerButton.disabled = false;
  webcamButton.disabled = true;
};

callButton.onclick = async () => {
  const call = await calls.create({
    user_id: userId,
  });
  const callId = call.id;

  callInput.value = callId;

  pc.onicecandidate = (event) => {
    event.candidate &&
      offerCandidates.create({
        call_id: callId,
        data: event.candidate.toJSON(),
      });
  };

  const offerDescription = await pc.createOffer();
  await pc.setLocalDescription(offerDescription);

  const offer = {
    sdp: offerDescription.sdp,
    type: offerDescription.type,
  };

  await calls.update(callId, { offer });

  calls.subscribe(callId, (e) => {
    const data = e.record;
    if (!pc.currentRemoteDescription && data?.answer) {
      const answerDescription = new RTCSessionDescription(data.answer);
      pc.setRemoteDescription(answerDescription);
    }
  });

  answerCandidates.subscribe("*", (e) => {
    if (e.action === "create") {
      if (e.record?.call_id === callId) {
        const data = e.record.data;
        const candidate = new RTCIceCandidate(data);
        pc.addIceCandidate(candidate);
      }
    }
  });

  hangupButton.disabled = false;
};

answerButton.onclick = async () => {
  const callId = callInput.value;
  const call = await calls.getOne(callId);

  pc.onicecandidate = (event) => {
    event.candidate &&
      answerCandidates.create({
        call_id: call.id,
        data: event.candidate.toJSON(),
      });
  };

  const offerDescription = call.offer;
  const remoteDescription = new RTCSessionDescription(offerDescription);
  await pc.setRemoteDescription(remoteDescription);

  const answerDescription = await pc.createAnswer();
  await pc.setLocalDescription(answerDescription);

  const answer = {
    type: answerDescription.type,
    sdp: answerDescription.sdp,
  };

  await calls.update(call.id, { answer });

  offerCandidates.subscribe("*", async (e) => {
    if (e.record?.call_id === call.id) {
      if (e.action === "create") {
        const data = e.record.data;
        const candidate = new RTCIceCandidate(data);
        await pc.addIceCandidate(candidate);
      } else if (e.action === "delete") {
        await offerCandidates.unsubscribe();
        window.location.reload();
      }
    }
  });
};

hangupButton.onclick = async () => {
  const callId = callInput.value;
  pc.close();
  await calls.unsubscribe(callId);
  await calls.delete(callId);
  await answerCandidates.unsubscribe();
  window.location.reload();
};
Running the example
Run the following command to start the client (make sure the server is running in a separate terminal client):
npm run devIf successful you should see the following:
  VITE v4.5.0  ready in 547 ms

  ➜  Local:   http://localhost:5173/
  ➜  Network: use --host to expose
  ➜  press h to show help
Open up two browsers with the same url:
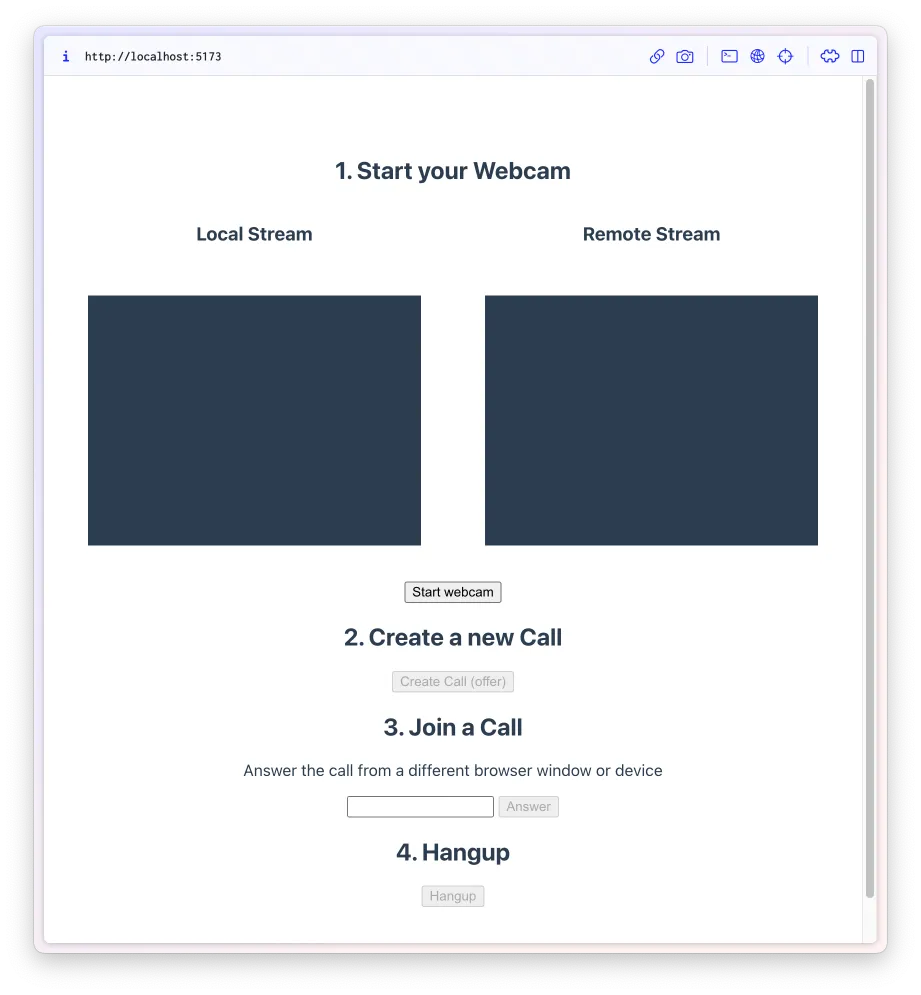
In the first window click Start webcam and then Create Call (offer).
This will ask for camera permission and then generate a new id and add it to the Join a Call text field.
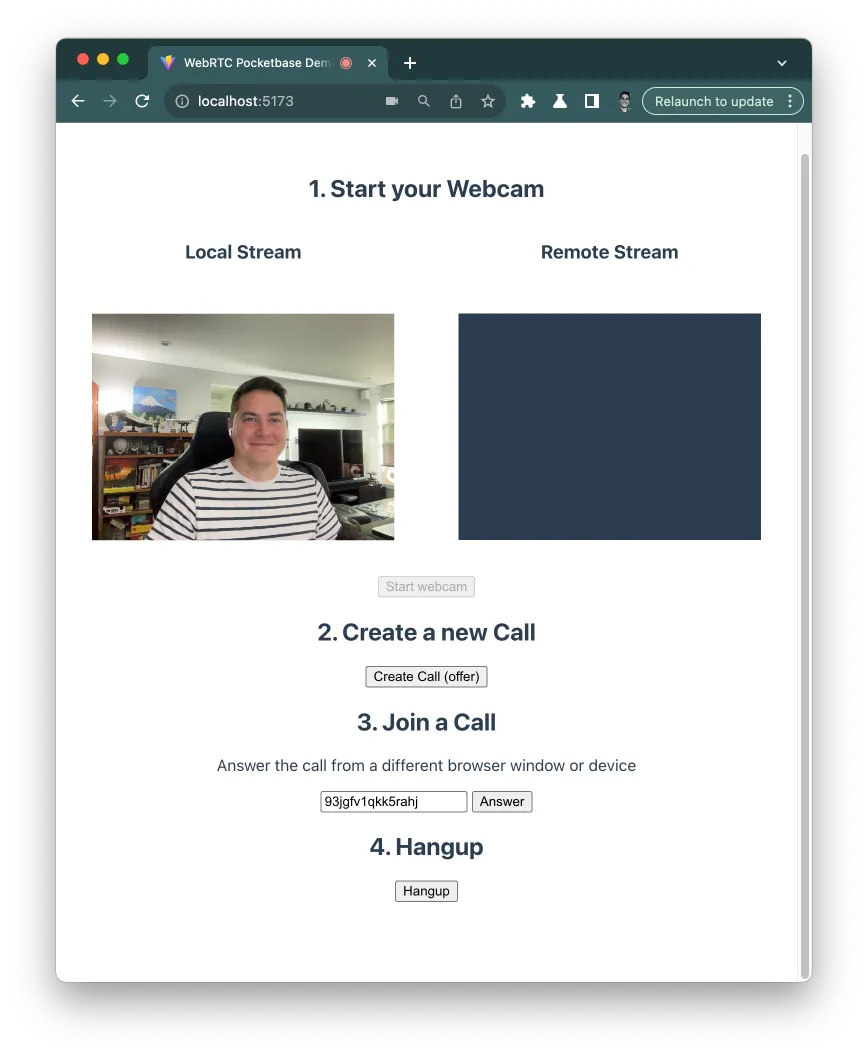
Copy the new id and paste it in the second window field and click Start webcam.
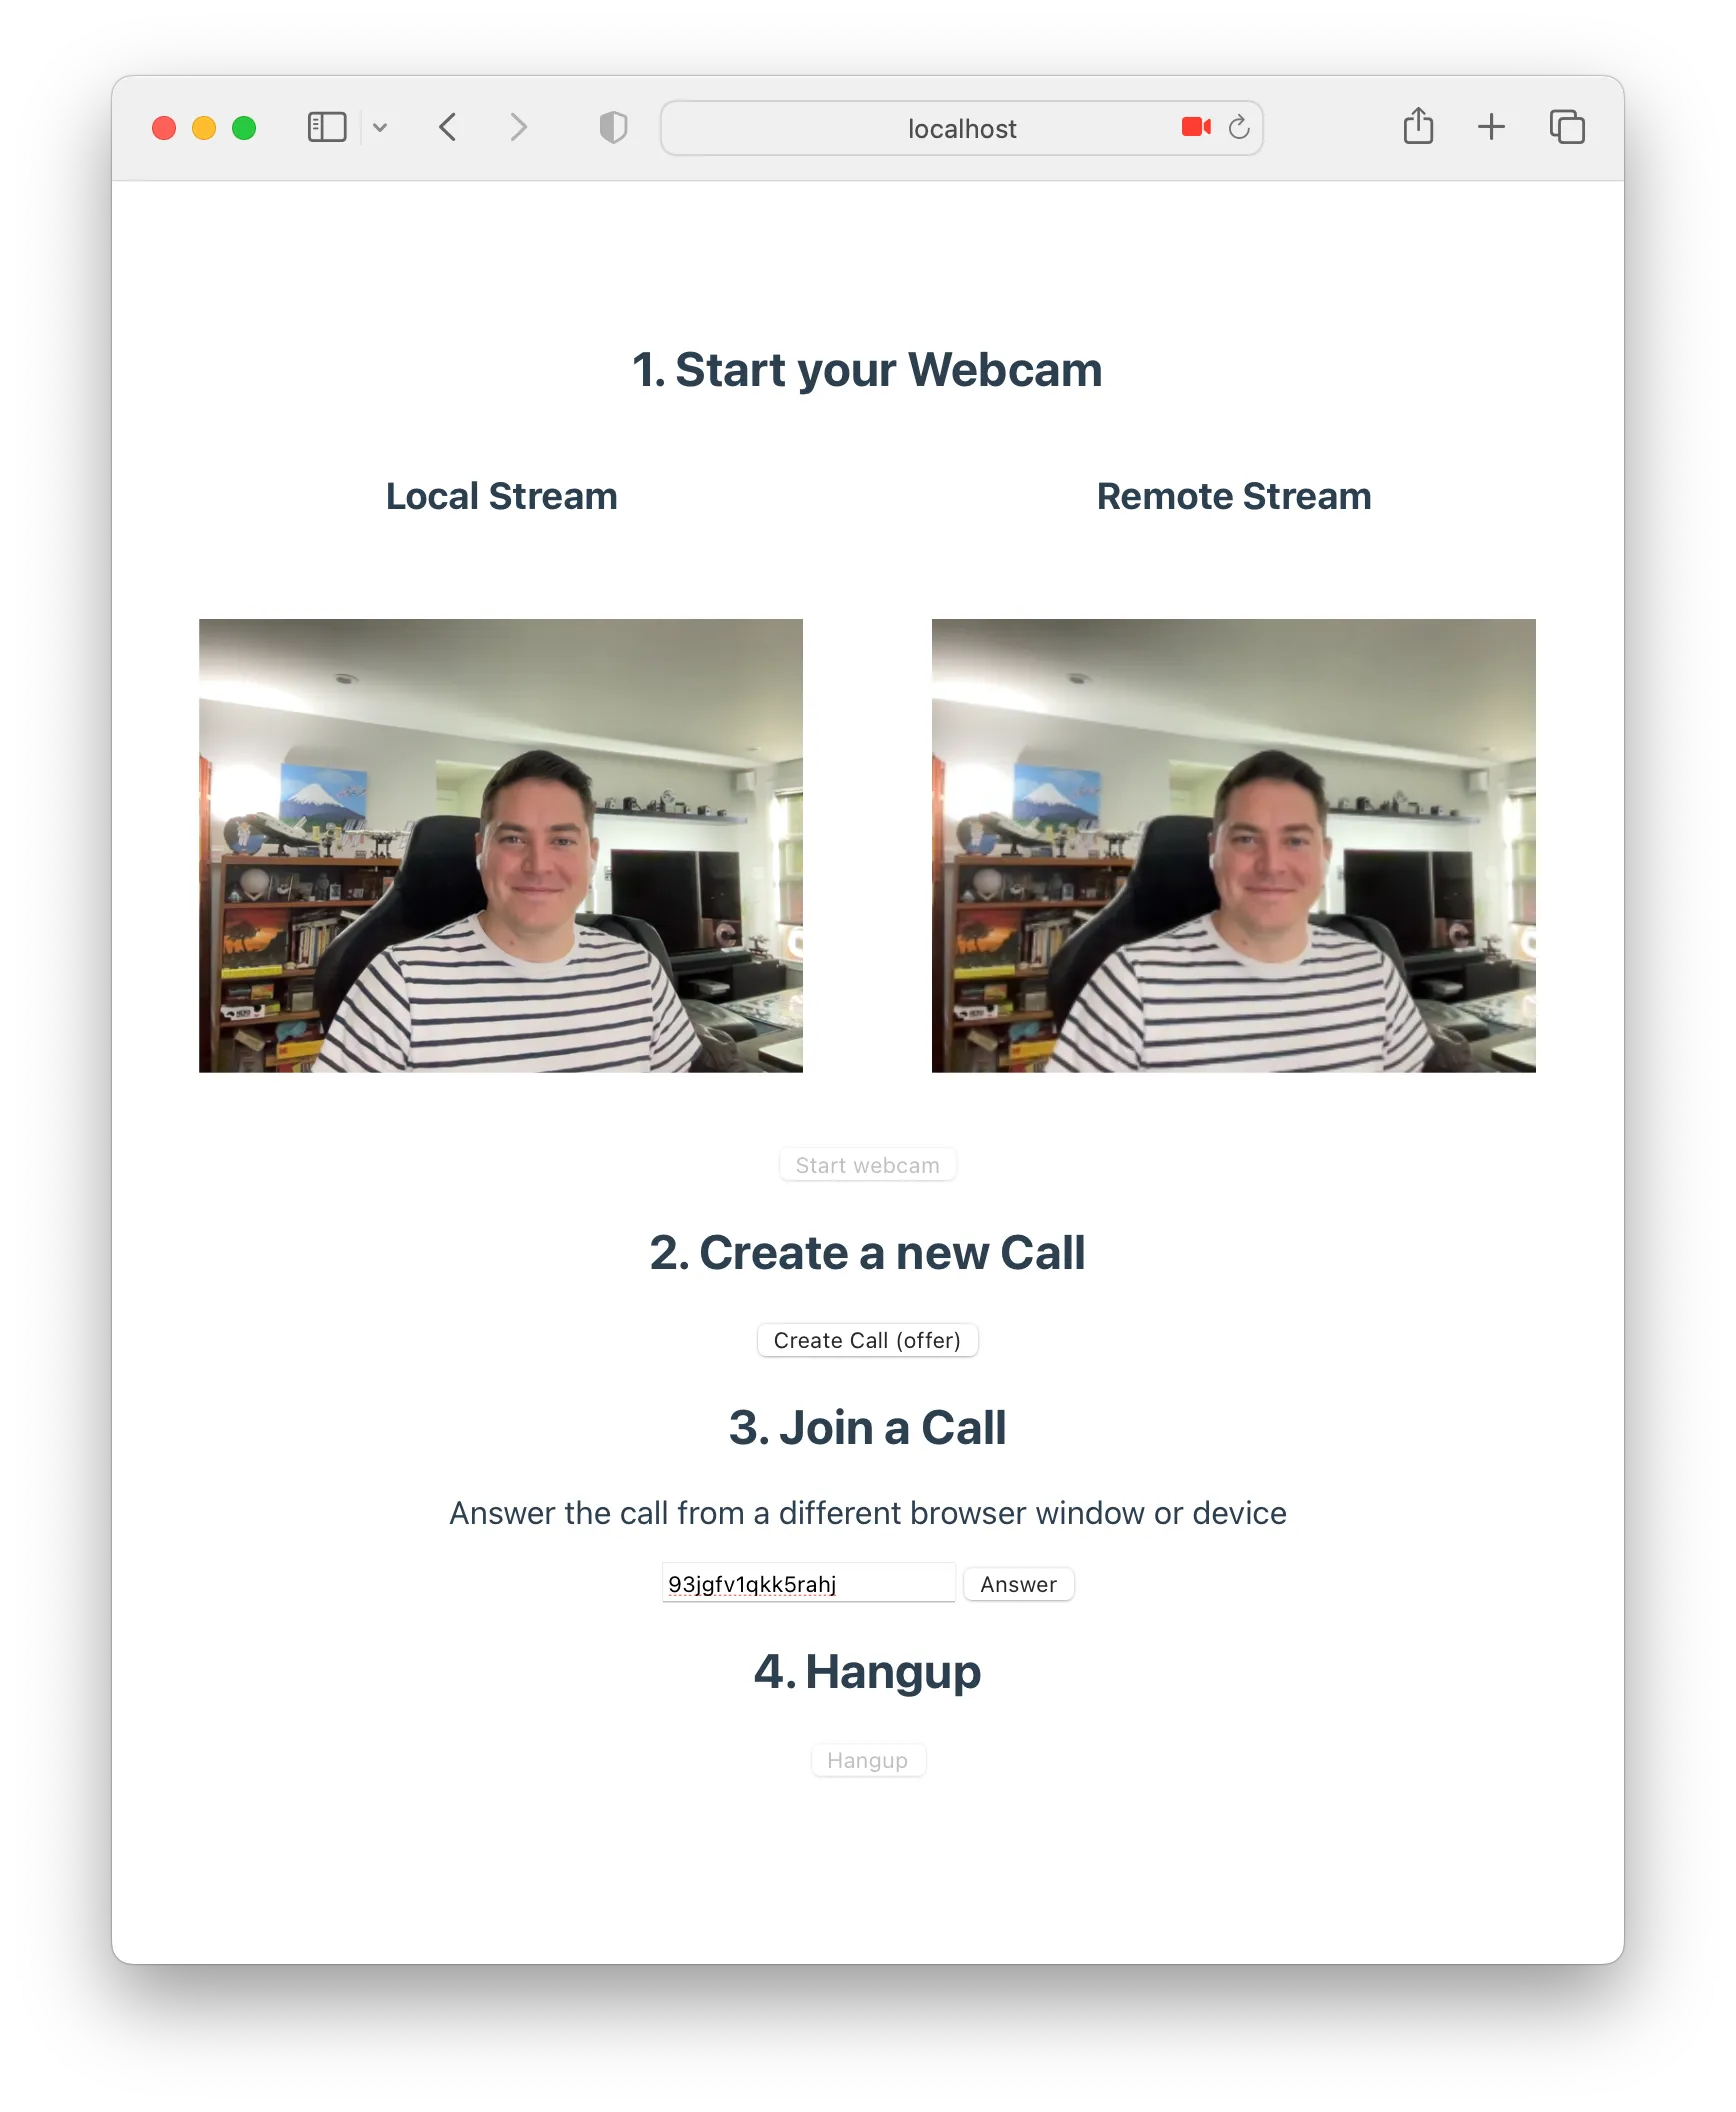
Then click Hangup when you are done with the call 🎉.
Conclusion
You can find the source code here.